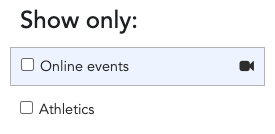
You may have previously organized online events with a custom category or tag, but LiveWhale 1.7.1+ also supports a native taxonomy for online events.
When an event creator marks an event as online, they can enter a URL and Join Button text. LiveWhale also then changes the invisible Google JSON-LD markup that we provides to meet their new online specification. There are also new front-end variables for how you style and filter online events.
Theming for online events
These changes are included in the core theme with 1.7.1, but you’ve probably already customized at least one of the affected components. Follow the steps below to incorporate the newest online events code into those components, or reach out to support if you run into questions or issues.
On an individual event page
In your lw_cal_event_detail.html component, make the following changes:
-
When an online event URL is supplied, add the “Join Event” button (suggested placement: after event image) and optional instructions.
{[ if (obj.online_url) { ]} <a class="lw_join_online" href="{{ obj.online_url }}"> {[ if (obj.online_button_label) { ]} {{ online_button_label }} {[ } else { ]} Join Event {[ } ]} </a> {[ } ]} {[ if (obj.online_instructions) { ]} <div id="lw_cal_online_instructions"> {{ online_instructions }} </div> {[ } ]} -
Optional: Feel free to replace
class="lw_join_online"in the above with your own CSS classes (likebtnfor Bootstrap) and style accordingly. If you use.lw_join_onlineit will receive button styling similar to the Subscribe button from the core theme. -
Optional: Indicate an online event using the video camera icon (suggested placement: before time).
{[ if (obj.is_online) { ]} <i class="lw-icon lw-icon-videocam" aria-label="Online event"></i> {[ } ]} -
LiveWhale CMS: If you are using the static events.php details page template for your events rather than lw_cal_event_detail.html, you can use similar XPHP code with the variables details_online_url, details_online_button_label, and details_online_instructions:
<xphp if="details_online_url">
        <a class="lw_join_online" href="">
                <xphp content="true">
                        <if var="details_online_button_label" />
                        <content>
                                <xphp var="details_online_button_label" />
                        </content>
                        <else content="true">
                                <content>
                                        Join Event
                                </content>
                        </else>
                </xphp>
        </a>
</xphp>


<xphp if="details_online_instructions">
        <div id="lw_cal_online_instructions">
                <xphp var="details_online_instructions"/>
        </div>
</xphp>
In event listings
In your lw_cal_event.html component, make the following changes:
-
Indicate an online event using the video camera icon (suggested placement: before time).
{[ if (obj.is_online) { ]} <i class="lw-icon lw-icon-videocam" aria-label="Online event"></i> {[ } ]} -
Optional: Add an lw_is_online CSS class if you’d like to add your own special styling, by adding the below next to
<div class="lw_cal_event
{[ obj.is_online ? print(' lw_is_online') : '' ]}
Filtering by online events
-
We like placing the online events checkbox just before your other Event Type filters in lw_cal_categories.html:
<div id="lw_cal_online_selector" class="lw_cal_selector"></div>but you can place it elsewhere in your components or template/sidebar if you prefer. (If placing in the main template, you can use the shortcut syntax
<xphp var="lw_calendar_online" /> -
After adding the checkbox, add the following to lw_cal_showing.html to incorporate online events into your “now showing” text. (If you haven’t customized lw_cal_showing.html in the past, you can ignore this step and continue using the core version.)
{[ if (obj.only_online) { ]}
        <p>Showing <strong>online events</strong> only</p>
{[ } ]}
Optional: You can also customize the appearance of that checkbox by copying the new lw_cal_online_selector.html component from the core theme into your theme’s components folder. Or, style it with its own outlined box by adding something like the following to your global theme’s calendar.less:
form#lw_cal_online_selector label {
        background: #f0f6ff;
        margin: 0 -10px !important;
        padding: 10px;
        border: 1px solid #bbb;
        display: block;
        cursor: pointer;
}
form#lw_cal_online_selector .lw-icon {
        float: right;
}
This image demonstrates the default styling: 
This image demonstrates the above CSS:

Adding online events to your public submission form
You can accept online events on your public submission form using the following steps.
Simple version: URL only
If you add a text input named event_online_url to your form, LiveWhale will mark any submissions where that field is completed as online:
<label for="event_online_url">Event web address:</label>
<input type="text" name="event_online_url" id="event_online_url">
Advanced version: All fields
If you prefer, you can add more fields to your submission form, including a class="lw_online_fields" container that will be hidden by default until a checkbox id="lw_is_online" is checked.
<label><input type="checkbox" name="event_is_online" id="event_is_online"> This is an <strong>online event</strong></label>

<div class="lw_online_fields">
  <div>
    <label for="event_online_url">Event web address:</label>
    <input type="text" name="event_online_url" id="event_online_url">
  </div>
  <div>
    <label for="event_online_instructions">Special instructions?</label>
    <textarea name="event_online_instructions" id="event_online_instructions" rows="3"></textarea>
  </div>
</div>
Here’s the full list of supported fields:
| Field Name | Type | Description | Required? |
|---|---|---|---|
| is_online | checkbox | If checked, event marked online | No – any events with event_online_url will also be marked as online |
| online_url | text | Event web address | No – you can still check an event as is_online with no URL |
| online_instructions | textarea | Special instructions? | No |
| online_button_label | text | “Join Event” button label | No – only needed if you want submitters to be able to replace “Join Event” with “Register” or “Join Webinar” etc. |
| online_type | radio | 1 = Online only, 2 = Hybrid | No – if you don’t supply the radio, it’s assumed that all events are type 1 = Online only |
 LiveWhale Support