There are lots of ways to integrate LiveWhale Calendar and LiveWhale CMS with external services. You can send traffic information to Google Analytics, for instance. Almost every type of API integration is possible, with a little bit of work. This page explains some of the most common.
Event Integrations
Using Linked Calendars, you can pull any ICAL (.ics) feed into LiveWhale to sync events. Sometimes, it can be a bit tricky to find the ICAL feed URL for individual services. Or, there may be cases where additional code is useful for finessing the results just the way you like. Check out onBeforeSync if you’re interested in writing custom code that can filter and edit linked calendar items before they appear on your site.
Google Calendar
Google Calendar doesn’t provide a lot of rich, marketing content for events, but you can still load those events into LiveWhale Calendar to ensure complete information appears on your school’s calendar. Follow these instructions for “Get your calendar (view only)” to access the ICAL URL for your Google Calendar. Once you have that URL, you can paste it into LiveWhale’s Add a new Linked Calendar page.
PrestoSports
PrestoSports publishes ICAL feeds that you can plug into LiveWhale Calendar as linked calendars. We recommend setting up a linked calendar for each sport, so you can customize the linked calendar default image and tags to be unique for each sport.
To access the PrestoSports ICAL feeds, navigate to the individual sport’s Schedule page. Scroll all the way to the bottom to find the “iCalendar” option.
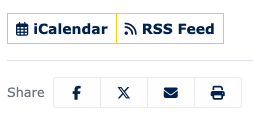
Right-click the “iCalendar” button and choose to Copy the link address.
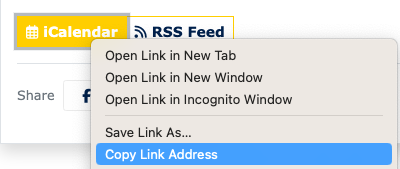
Then you can paste it into LiveWhale’s Add a new Linked Calendar page.
SIDEARM
SIDEARM publishes ICAL feeds that you can plug into LiveWhale Calendar as linked calendars. We recommend setting up a linked calendar for each sport, so you can customize the linked calendar default image and tags to be unique for each sport.
To access the SIDEARM ICAL feeds, navigate to the individual sport’s Schedule page and click “+ Add to Calendar” near the top of the page. Sometimes this is just a “+” icon, depending on the design.
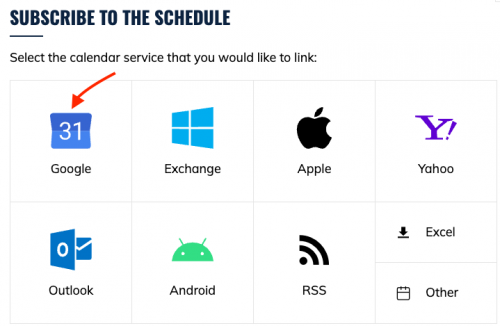
Then, from the popup, it’s choose the last option for Other, and then when you’re brought to Google, don’t click “Add.”
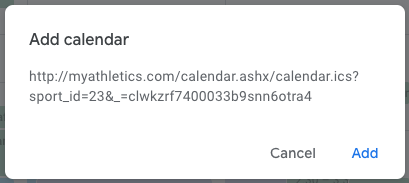
Instead, copy the .ics URL.
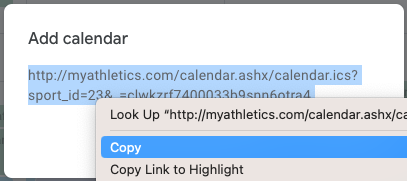
Then you can paste it into LiveWhale’s Add a new Linked Calendar page.
Note: If your SIDEARM instance doesn’t give you a .ics file from that interface, you can use these alternate steps instead:
- Go back to the Subscribe to the Schedule popup.
- Before completing the popup, right click anywhere and choose “Inspect Element” to open the web inspector. We want to grab the .ics URL that gets downloaded. In the web inspector, choose the “Network” tab so you can see a log of all upcoming downloads.
- Use the last “Other” option in the popup and click “Subscribe Now.” This will download the .ics file, and the URL should get added to your Network tab in the inspector.
- From the Network tab, right-click the subscribe?… URL and choose Copy > Copy URL.

- Then you can paste that URL into LiveWhale’s Add a new Linked Calendar page.
CampusGroups
CampusGroups publishes ICAL feeds that you can plug into LiveWhale Calendar as linked calendars. To access the CampusGroups ICAL feeds, navigate to the main events page and click Subscribe.
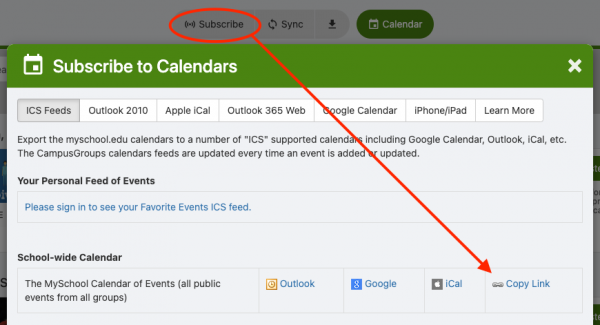
Then, use the “Copy Link” option to get the ICAL URL, and paste it into LiveWhale’s Add a new Linked Calendar page. (Note, some CampusGroups-specific ICAL fields get automatically mapped to LiveWhale fields during import.)
25Live
25Live publishes ICAL feeds that you can plug into LiveWhale Calendar as linked calendars. This will bring in most of the commonly-used event fields (though not image). We do have some custom code we can configure to do additional sync work like matching up custom fields, event types, and tags from 25Live to LiveWhale versions. Please get in touch if you’d like to discuss setting up this kind of integration.
Campus Labs Engage / OrgSync
Campus Labs publishes ICAL feeds that you can plug into LiveWhale Calendar as linked calendars. To access the Campus Labs Engage ICAL feed, navigate to the your main Events view and copy the “iCal Feed” link in the lower-right corner. You can paste this in to LiveWhale as a linked calendar, though it does show events across all Engage organizations in one calendar.
Optionally, use the instructions below to install a custom module that can split the one Engage ICAL feed into multiple linked calendars, one for each organization.
Perform these steps on your dev site first for testing.
-
Download this custom module code and save it as engage.php to your computer.
-
SFTP into your dev site and create the directory /livewhale/client/modules/engage/
-
Inside that directory, create the subdirectory /live/ and upload engage.php from Step 1 there.
-
Add to your global.config.php file the “iCal Feed” url from Engage as
$_LW->CONFIG['ENGAGE_ICAL_URL']='https://engage.myschool.edu/events.ics'; -
Go to the Engage page whose events you want to import and note the organization name. This is what will get added to the end of your new ICAL URL. (It’s also visible in the ICAL file itself, such as “X-HOSTS:Campus Recreation”).
-
Now you can login to LiveWhale and add a new Linked Calendar, using the URL https://calendar.mysite.edu/live/engage/host/Campus Recreation (or whatever your organization name from Step 5 was). Repeat this step for as many groups as you’d like.
Once you’re satisfied with the results, you can re-do steps 2–6 on your production server.
Presence
If you’re using Presence to manage events, you probably want to be pulling those events into LiveWhale. Presence does provide iCal feeds which LiveWhale supports out-of-the-box as Linked Calendars. We also have a separate API integration that connects to the Presence JSON API to pull more full-featured event data (event images, for example) – reach out to learn more.
EMS
EMS is a robust room reservation service whose API can be used in tandem with LiveWhale Calendar for displaying public event data. A primer on how the LiveWhale-EMS integration works can be found here, and please reach out if you’d like to request an estimate for integrating EMS with your LiveWhale instance.
Social Media Integrations
Twitter / X
LiveWhale CMS allows you to create Twitter widgets that display tweets, mentions, or favorites from your account(s).
Nowadays, this sort of access requires a Twitter Developer Account. If you have a legacy app in existence from before this requirement was added, you should be able to continue managing it. Otherwise, follow the steps below to request an account.
Requesting a Twitter Developers account
We recommend doing these steps and creating your app using an instutitional, rather than a personal, Twitter account.
- To request access, login to Twitter and go to https://developer.twitter.com/.
- In the main menu (top right) choose “Apply,” then click “Apply for a developer account”
- They will ask you what your use case is: I’d recommend “Build customized solutions in-house”
- They’ll ask you to confirm your username/account (you can choose an individual account, or a team account if you’ll be sharing access, up to you)
-
You’ll be asked for “In your words”—
In English, please describe how you plan to use Twitter data and/or APIs. The more detailed the response, the easier it is to review and approve. (minimum 200 characters)
In here, I’d recommend you write a short explanation of how you plan to use the Twitter integration for LiveWhale. You can mention that your content management system allows you to embed customizable views of your school’s tweets/favorites onto a web page, but doing so requires an API key and access token.
- Answer No to “Are you planning to analyze Twitter data?”
- Answer No to “Will your app use Tweet, Retweet, like, follow, or Direct Message functionality?”
- Answer Yes to “Do you plan to display Tweets or aggregate data about Twitter content outside of Twitter?” For the explanation field, say a bit more along the same lines as in #5 above – you are managing a .edu website and you want to be able to embed your school’s twitter posts/favorites/mentions, etc.
- Answer No to “Will your product, service or analysis make Twitter content or derived information available to a government entity?”
- Confirm your application and Submit.
In our most recent test, the application was approved in under an hour, but this could vary.
Once you have a Twitter Developers account
Go to https://developer.twitter.com/ and Create an App.
- Enter a Name (e.g. “Twitter for LiveWhale”)
- Save the “API key” (you’ll need this as
CONSUMER_KEYlater) - Save the “API secret key” (you’ll need this as
CONSUMER_SECRETlater) - Go to “App Settings”
- Go to the “Keys and tokens” tab
- Under “Authentication Tokens,” find “Access Token & Secret for @username” and click Generate
- Save the “Access token” (you’ll need this as
USER_TOKENlater) - Save the “Access token key” (you’ll need this as
USER_SECRETlater)
Now, find your LiveWhale config.php file (e.g. /core/config.php) and edit it. Find the following “CREDENTIALS” code and edit the “TWITTER” values inside:
$GLOBALS['LIVEWHALE_CONFIG']['CREDENTIALS']=[
        ...
        'TWITTER'=>[
                'CONSUMER_KEY'=>’123',               // Twitter's "API key" for your app
                'CONSUMER_SECRET'=>’456',    // Twitter's "API key secret" for your app
                'USER_TOKEN'=>'abc',         // Twitter's "Access token" for your user
                'USER_SECRET'=>'def'         // Twitter's "Access token key" for your user
        ],
        ...
];
Replace the dummy values in the code above with your four Twitter-supplied values. Once you save, you can begin to utilize Twitter widgets across your site.
LiveWhale allows you to share events, news, or other content to Facebook when users click the share icon.
Setting an og:image metatag for Facebook
LiveWhale automatically generates Open Graph metadata for your pages and content—these are the descriptive tags that Facebook and other social media read in order to generate the link preview. Most of this happens without you needing to do any extra work: your news summary goes in as the description, your event image is set as the preview image, etc.
However, in some cases you might want a bit more control over which image LiveWhale indicates as the preview image for your page. You can use data-share-image="https://www.myschool.edu/my-image.jpg" attribute to set a share image for your page. This is designed to be as flexible as possible—you might add it to a template or generate it from a LiveWhale widget. If you don’t set a data-share-image , LiveWhale will default to using:
- The image assigned to the content (for news, stories, profiles, etc.)
- The first image in an editable WYSIWYG area (for pages)
We hope that in most cases, the automatically selected image will be the one you want. In any other case, use data-share-image .
Embedding Facebook posts in LiveWhale CMS
In the past, LiveWhale CMS included a “Facebook widget” that could pull posts from Facebook via their API. This functionality was deprecated in 2020 due to shifting requirements of the Meta API app review process.
Instead, you can embed individual posts from Facebook using their embed code, or for embedding and customizing feeds you might explore a 3rd-party solution like Juicer or Taggbox. If you have a 3rd-party social stream that you like, please let us know.
In the past, LiveWhale CMS included an “Instagram widget” that could pull posts from Instagram via their API. This functionality was deprecated in 2020 due to shifting requirements of the Meta API app review process.
Instead, you can embed a simple feed using a service like LightWidget, or for a more customized approach you might explore a 3rd-party solution like Juicer or Taggbox. If you have a 3rd-party social stream that you like, please let us know.
Database Integrations
There are two options in LiveWhale CMS for integrating data from external databases (like directory information, course listings, etc.). The first is using a Profile Data Source (below), which lets you sync certain fields on a profile from an external data source.
The second is a custom LiveWhale module called “data_source” which lets you create standalone widgets displaying information from Banner, Oracle, MySQL, or static CSV or XML files. We can help set up the data_source module to meet your needs, feel free to get in touch for an estimate or if there’s another integration outside of what’s mentioned here that you’d like to discuss.
Creating a Profile Data Source
You might want to pull certain directory information into your faculty or staff profiles from an external source, like a MySQL database or LDAP directory. You can do this automatically by using a Data Source.
To create a new data source:
- Login to your LiveWhale Interface
- Click the Profiles tab
- Click the Data Sources sub tab
- Give your data source a name in the Title field
- Select the Type (mysql or ldap) from the drop-down menu
MySQL: enter the database host server, port, username, password, table name, key field (ie., primary identifier), and select how often to refresh the data (hourly, daily, weekly, or manually).
LDAP: enter the host, port, ssl (yes or not), username, password, DN, key field (ie., uid, samsaccountname), and select how often to refresh the data (hourly, daily, weekly, or manually).
CSV: enter the location of the static file, as well as information on the delimiter and escape characters
Setting up Profile Fields to Sync
After you’ve created your Data Source (above), create or edit the profile type you want to sync with.
-
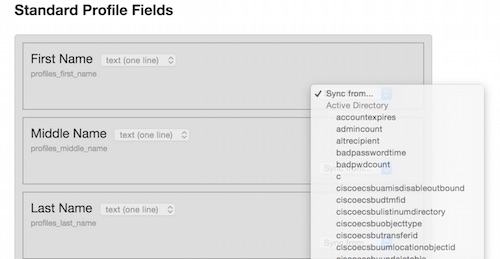
While editing your Profile type, fields such as first name, middle name last name will display a Sync from… drop-down menu where you can select the data attribute from your data source to map
-
Custom Fields created will also have the option to sync data from the Sync from… drop-down menu
-
Once you are done, click the Save this profile type
Now when adding a profile:
-
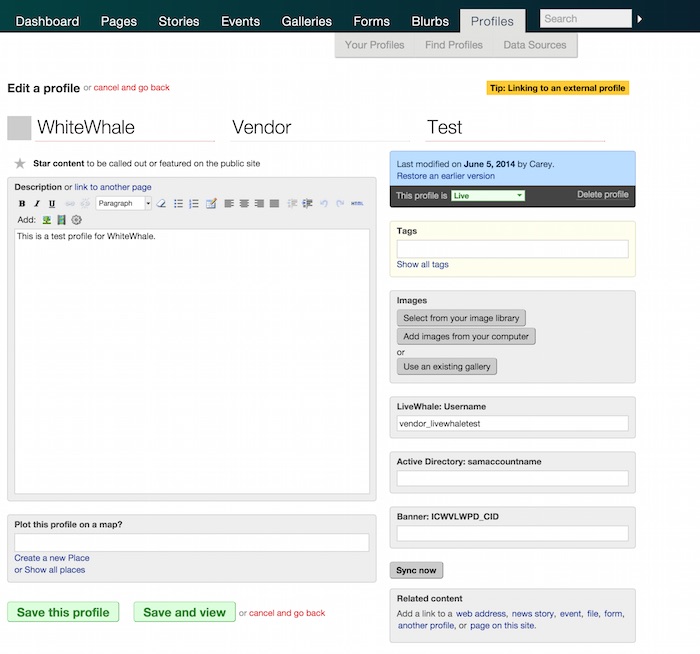
Fill out the LiveWhale: username and the Key Field (i.e., samsaccountname, uid, etc…) used in the data source of the profile person. This will sync the attribute data to the profile fields while making these sync’d fields non-editable by profile owners or administrators.
-
Click Save this profile when finished
The sync’d profile fields will refresh its data based on the setting configured in the Data Source.
 LiveWhale Support