LiveWhale 2.0.0 added new tools for managing the CMS page editing experience, and since LiveWhale 2.6.0 these tools are also available for back-end editing (events, news, profiles).
Sometimes you want to allow editors to insert design elements without either coding them into the template or making them each as separate widgets. Content Layouts allows you to define editable layouts that can be placed in any WYSIWYG editor.
Creating a content layout
For each content layout you want to add to your site, upload to /_ingredients/templates/wysiwyg:
/_ingredients/templates/wysiwyg/wysiwyg.my-template.xml
an .xml file that contains the markup for your layout, described below
/_ingredients/templates/wysiwyg/wysiwyg.my-template.png
and a .png screenshot of the element that editors will see as a Preview when inserting (optional)
/_ingredients/templates/wysiwyg/wysiwyg.my-template.preview.(less/scss/css)
plus a .preview.less, .preview.scss, or .preview.css stylesheet that will be used when back-end editing (optional, LiveWhale 2.6.0+)
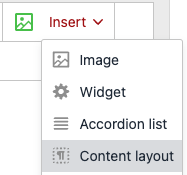
LiveWhale will automatically detect the above files and use them to construct the Insert > Content layout menu option.

In LiveWhale 2.16.0 and later, you can also add subdirectories to /_ingredients/templates/wysiwyg/ to better organize your content layouts. LiveWhale will scan any subdirectories and will flag with a dashboard error if any duplicates are detected.
Content layout syntax guide
Basic Template
The basic structure of /_ingredients/templates/wysiwyg/wysiwyg.my-template.xml is:
<widget type="template">
<title>My Content Layout</title>
<description>Short description of this layout.</description>
<content>
        HTML markup goes here.
</content>
</widget>
Inside <content>, a number of special markup elements are supported.
Editable and non-editable areas
We use the TinyMCE Noneditable plugin to allow editable and non-editable regions within a content layout. By default, every element is editable unless it or one of its parents contains class="mceNonEditable"
<div class="mceNonEditable">This text can't be edited.</div>
<div class="mceNonEditable">
        This text can't be edited.
        <div class="mceEditable">This text can be edited.</div>
</div>
Best practice: Put class="mceNonEditable" on the outermost element of your content layout, and then only add class="mceEditable" to children that you want editors to be able to type into.
Suggestion: Use class="mceEditable" on block-level elements like <div>, don’t put it directly on header or paragraph elements. Sometimes when editors are typing or hitting return, the current header/paragraph can get duplicated.
Layout blocks
A layout block is a repeatable design element that you want editors to be able to add/remove/rearrange instances of within a single content layout. For instance, in a grid design, your layout block might be a single grid element, so editors can add/delete them as they work.
<div class="lw_layout_block">This markup can be duplicated.</div>When editing a page, these blocks will get + (duplicate) and x (delete) buttons added to them, as well as arrow buttons for rearranging the order.
<div class="two-column-grid">
        <div class="column lw_layout_block"><!– etc –></div>
        <div class="column lw_layout_block"><!– etc –></div>
</div>
Note: In order for the duplicate and delete buttons to work as expected, the lw_layout_block class cannot be attached to the outermost element of your markup.
<!– Incorrect: .lw_layout_block on the outermost element will cause unexpected behavior –>
<div class="lw_layout_block mceNonEditable row">
    <div class="mceEditable column">Column 1</div>
    <div class="mceEditable column">Column 2</div>
</div>

<!– Correct: .lw_layout_block has a container around it –>
<div class="mceNonEditable">
<div class="lw_layout_block row">
    <div class="mceEditable column">Column 1</div>
    <div class="mceEditable column">Column 2</div>
</div>
</div>
Currently class="lw_layout_block" is only supported on the <div> HTML element.
Placeholder text and links
Inside a content layout or layout block, you can add data-lw-placeholder to dictate paragraphs, headers, or links that will appear empty on the front-end but will receive placeholder text when editing.
Use data-lw-placeholder="true" for a default “Add text” placeholder.
Use data-lw-placeholder="Add program description" to define custom placeholder text.
<h3 data-lw-placeholder="true"/>
<p data-lw-placeholder="true"/>
The placeholder attribute also works on links. When an editor clicks the placeholder, the Add Link window will pop up.
<a class="my-custom-button" data-lw-placeholder="true"/>Locking image size
To lock the width/height of a WYSIWYG image inserted into your content layout, you can add data-image-size to any container div.
<div class="image-block mceNonEditable" data-image-size="300x300">
    <div class="mceEditable">
    <!– only 300x300 images will be allowed to be inserted here –>
    </div>
</div>
In LiveWhale 2.17.0+, you can do this at the page template level, too.
Placeholder images
To add a simple placeholder image, upload your desired image to LiveWhale and take note of it’s ID (for example, 111). You can include in your content layout code like:
<widget type="image">
    <arg id="id">111</arg>
    <arg id="width">800</arg>
    <arg id="height">600</arg>
    <arg id="crop">true</arg>
    <arg id="class">lw_fixed_dimensions</arg>
</widget>
The optional class lw_fixed_dimensions will tell the page editing tools to not allow users to edit the width/height when they double-click to replace that image with their own.
In LiveWhale 2.10.8 and later, you can configure a site-wide placeholder image by adding the following to your global.config.php:
$_LW->CONFIG['PLACEHOLDER_IMAGE']=111; // id of the placeholder imageAnd then in your image markup, you can use id=placeholder instead.
<widget type="image">
    <arg id="id">placeholder</arg>
    <arg id="width">800</arg>
    <arg id="height">600</arg>
    <arg id="crop">true</arg>
    <arg id="class">lw_fixed_dimensions</arg>
</widget>
Putting it all together
Here’s a complete example that combines all of the above tools to code a three-column content layout. All of the cta classes are examples that you could replace with your own theme classes.
<widget type="template">
<title>Graphic Call to Action</title>
<description>This layout displays two columns with graphic, header, and text.</description>
<content>
    <div class="cta-wrapper mceNonEditable">

        <div class="cta lw_layout_block">
            <div class="cta-image mceEditable">
                                <widget type="image">
                    <arg id="id">111</arg>
                    <arg id="width">800</arg>
                    <arg id="height">600</arg>
                    <arg id="crop">true</arg>
                    <arg id="class">lw_fixed_dimensions</arg>
                </widget>
            </div>
            <div class="cta-header mceEditable">
                <h4 data-lw-placeholder="Add marketing headline"/>
            </div>
            <div class="cta-body mceEditable">
                <p data-lw-placeholder="true"/>
                <a class="cta-button" data-lw-placeholder="true"/>
            </div>
        </div>

        <div class="cta lw_layout_block">
            <div class="cta-image mceEditable">
                                <div class="lw_layout_image" data-width="300" data-height="300"/>
            </div>
            <div class="cta-header mceEditable">
                <h4 data-lw-placeholder="Add marketing headline"/>
            </div>
            <div class="cta-body mceEditable">
                <p data-lw-placeholder="true"/>
                <a class="cta-button" data-lw-placeholder="true"/>
            </div>
        </div>

    </div>
</content>
</widget>
Restricting content layouts (LiveWhale 2.6.0+)
By default, any content layout you create will be available to all users in all contexts. Since LiveWhale 2.6.0, you can add an optional <args>...</args> section to your .xml file to define certain restrictions per content layout. You can restrict by context (frontend/backend), user permission level, or group(s).
Examples
User permission (admins only)
<widget type="template">
<title>Admin-only Callout</title>
<description>This layout is only accessible to admins.</description>
<content>
    <div class="admin-only-callout"><p>Text goes here.</p></div>
</content>
<args>
    <arg id="allow_for">admins</arg>
</args>
</widget>
Group
<widget type="template">
<title>Magazine Headline</title>
<description>This layout is only accessible in the magazine and magazine archive groups.</description>
<content>
    <div class="mceNonEditable magazine-headline">
        <h3 class="mceEditable">Headline</h3>
    </div>
</content>
<args>
    <arg id="group">Magazine</arg>
    <arg id="group">Magazine Archive</arg>
</args>
</widget>
Context (frontend/backend)
<widget type="template">
<title>Page Footer Block</title>
<description>This layout is only accessible when page editing.</description>
<content>
    <footer class="page-footer"><p>Text goes here.</p></footer>
</content>
<args>
    <arg id="allow_in">frontend</arg>
</args>
</widget>
All options
| Setting | Description | Example | Default | Values |
|---|---|---|---|---|
| allow_in | Defines the context the content layout may be inserted from |
<arg id="allow_in">frontend</arg>
|
all |
all backend frontend |
| allow_for | Defines the user type who may insert the content layout (Note: Each setting includes all higher permission levels – e.g., setting “curators” will allow for curators and admins. Setting “admins” will allow for admins only.) |
<arg id="allow_for">admins</arg>
|
all |
all publishers curators admins |
| group | Defines which group(s) may insert the content layout (supports multiple values) |
<arg id="group">Admissions</arg><arg id="group">Magazine</arg>
|
all |
all any group name |
Beta: Content Layouts v2
Content Layouts (CLs) leverage the TinyMCE template to essentially “stamp” pre-defined HTML into editable areas. However, this makes it difficult to go back and edit the HTML of a content layout once it’s been used on many pages—only newly inserted content layouts end up getting the new HTML.
To address this, LiveWhale 2.16.0 adds beta support for what we’re calling “Content Layouts v2” (CLv2).
Since this feature is still in development, functionality, syntax, or UI may change before its final release.
In CLv2, whatever HTML you’ve edited using the WYSIWYG tool inside of your content layout gets translated into a reduced widget syntax before saving:
<widget type="content_layout">
    <arg id="type">callout-left</arg>
    <arg id="editable">Contents of first editable area...</arg>
    <arg id="editable">Contents of second editable area...</arg>
</widget>
Then, when that page gets rendered on the front-end (or you go back to edit again) those editable area contents get placed back into the HTML markup from the content layout. This way, you can go back and easily tweak the markup of a CL .xml file, even after you’ve begun saving it on various pages.
CLv2 syntax:
<widget type="template">
  <title>Callout Left</title>
  <description>Callout box, floated to the left</description>
  <content>
    <div class="callout-left">
      <div class="callout-header editable">
         <h3>Callout header</h3>
      </div>
      <div class="callout-body editable">
        <p>Text here...</p>
      </div>
    </div>
  </content>
</widget>
To begin using CLv2, simply use class=”editable” on one or more divs in your HTML. No other special classes are needed (LiveWhale will apply the non editable and editable classes automatically). CLv2 does support lw_layout_block for repeatable sections.
Note: While you can place images, XPHP variables, and widgets inside of content layouts, you cannot nest CLv2. If you try, a warning message will appear.
Content Layouts v2 is backwards compatible. Any prior CLs you have defined will continue working: when you insert a CL onto a page, LiveWhale will use the v2 approach if class=”editable” is detected, and if not, it will fall back to using the prior v1 behavior. At this time, there is not any automation to replace v1 with v2—you can delete and re-insert a CL if you have updated your syntax to use class=”editable.”
 LiveWhale Support